Blocking Advertising Streams and Malacious Links on Web Pages
Blocking Advertising Streams and Malacious Links on Web Pages
Using an Ubuntu VM to run Pi-hole ad-blocker.
SD Smith
6/10/2019
Part of what I like about working in this cyber-security environment, is that CyDeR is also about Research. I enjoy testing new software that claims to add security or privacy, reduce spyware or telemetry, and provide an increase in network value. Researching malware is also an interesting part of the job, but this page is about restoring network value that has been stolen by adware servers tying up bandwidth.
The goal of testing Pi-hole was to determine two things: does it perform as it says it does-- does it help block the barrage of ad-based frames in websites. Second, will it block system level telemetry on Windows 10. Ad blockers are almost a necessity and there are good ones available for Firefox (though it has been reported Google will be removing ad blocking add-ons from Chrome). Similarly, Microsoft is positioning Windows 10 to copy Android in being a user-data compiler to profit from users’ data, instead of their wallet. Windows Firewall can be customized to block telemetry, but blocking it centrally would be simpler.
So will running a DNS server with black-listed ad sites help overall performance of the small network while providing additional security and privacy?
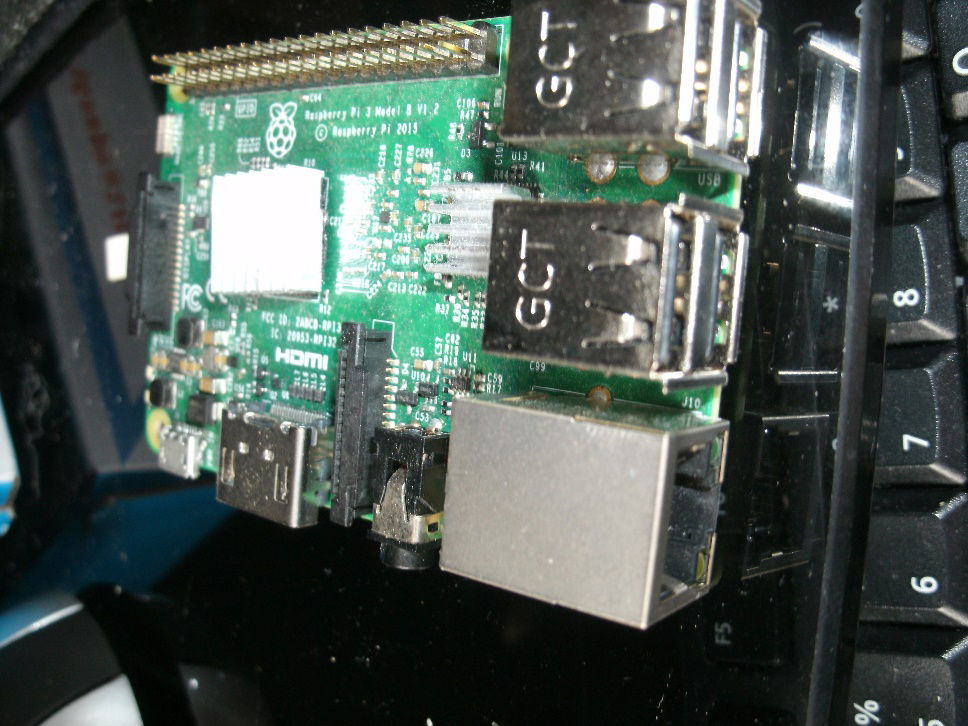
Obviously, if you’ve heard of Pi-hole, you know it’s supposed to be run on a Raspberry Pi board. These little monsters are great for working out IoT concepts and are beyond simple novelty. My first experience with the R-Pi board was when I purchased one for my son a few Christmas ago and then worked through a Python programming book with him using the Pi. There were no complaints from either of us about the Pi and the growing community of developers and kits make it a great platform for development of IoT devices, learning programming languages, and electronics.
However, I didn't want to tie-up the Raspberry Pi indefinitely, since we have other projects lined up for it, so on to other prospective devices for the Pi-hole implementation.
Several years ago I picked up a couple Banana Pi R2 boards to test. Their lack of documentation and finicky boot process relegated them to future projects, so I thought this would be the perfect job to test them as well. The Banana Pi R2 has 2 x Sata 3 ports, 2 x USB 3.0 port, 1 x USB 3.1 port, 0 USB 2.0, an eSata slot, and 5 gigabit ports, revealing it to be suited for a router or NAS. After browsing for a few hours, and not finding a suitable light-weight distro that would boot, the B-Pi R2 was relegated to the future projects shelf also.
So back to Pi-hole. I ditched the B-Pi R2 also so my focus could return to the point of this project. I spun up a VMWare Ubuntu 16 image and followed the installations instructions on Pi-hole.net.
Being familiar with the amazingly poor documentation of Linux projects, and the difficulties of matching version to target, the ease of which Pi-hole installed itself was quite remarkable.
That was all it took and Pi-hole started the install configure process. Answering basic network questions and interface queries made the process painless. It was running in those few minutes. . . but the pain was coming, no fault of Pi-hole.
I’ve been using VMWare for years. I found it to be easier to configure and of much higher performance than Virtual Box, so I’ve always stuck with it. Having setup Linux servers in Hyper-V, VMWare is comparatively amazing. Those Hyper-V servers always ran vastly slower than the same VM in VMWare’s Workstation. That said, the pain started with VMWare’s network setup.
I’ve used Workstation version 12, 14 and 15, and have never had an issue getting a VM connected to the LAN in the needed configuration. For Pi-hole to work, it needs a static IP address. Then this address has to be entered into connected devices as the DNS server. Though changing the IP in Pi-hole is not difficult (pihole –r), changing the DNS server on all connected devices would be a hassle. Alternatively, if your router has the option, the DNS server can be set there. This means that all devices on the network using default DNS would go to Pi-hole—definitely the better setup if your router allows the user to change that setting. My Xfinity router does not allow for DNS specification, meaning I have to configure each connected device to use Pi-hole for DNS. (Eventually, I’ll setup my good router and get the full benefits of Pi-hole).
Back to Workstation 15. On my trial machine, Pi-hole setup and worked flawlessly. No trouble with IPs. On the prototype machine however, it took significant time to get it to connect. The trouble came with creating a static IP. In Ubuntu, it’s simple enough. Edit the connection, change IPv4 to manual, set the address, subnet, and gateway, then it’s done. Easy enough. But the VMWare Virtual Lan doesn’t like that. Regardless of the VLan settings, the VM could not specify an IP and connect. Finally, I deleted all the VMWare Host adapters to try again. My “prototype” machine has 4 NIC ports and the only way it worked was by assigning one of the Host NIC “adapters” to the VMWare machine in Virtual LAN. In the Windows (Host) Network Adapters, I disabled the VMWare bridge protocols so that VMWare could only use the adapter I assigned to it.
The only other issue is to change router settings so that the NIC I assigned to the VM gets the same IP every time. I’m not in a hurry to do this since, despite its shortcomings, the Xfinity gateway/router does tend to assign the same IP to each NIC automatically.
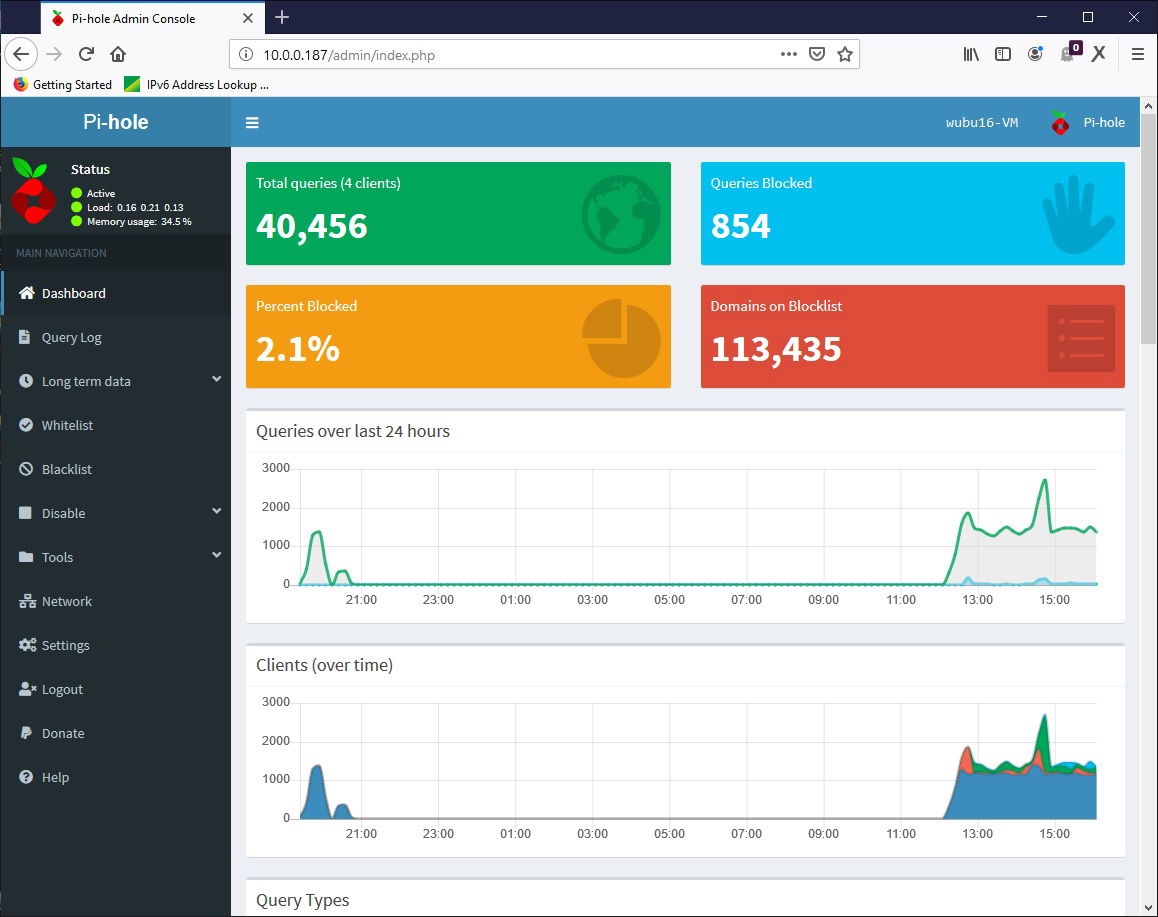
So with Pi-hole running in the Ubuntu 16 VM, I set up a few devices with their manual DNS assignment. Pi-hole has a great looking interface which is accessed remotely by using the IPaddress/admin and password it assigns at setup. Write it down, resetting the configuration doesn’t reset the admin password.
The remote interface is shown above. It is very functional and intuitive. Some paid programs aren’t designed this well.
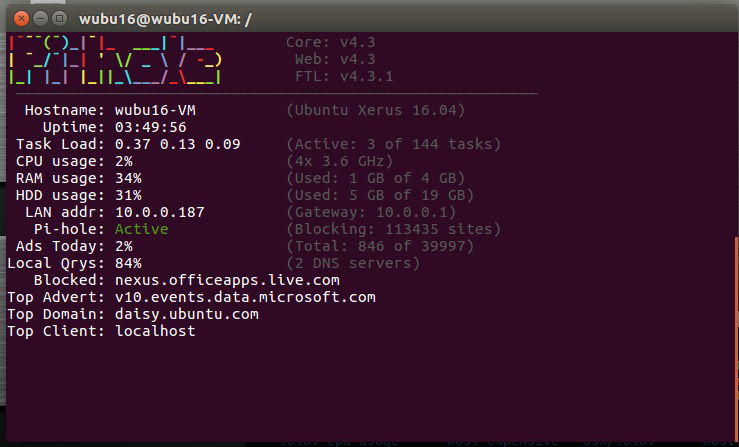
On the Pi-hole machine (or VM), it can be left in monitor mode also, displaying a few statistics and letting the user know it’s working.( sudo pihole –c, shown below )
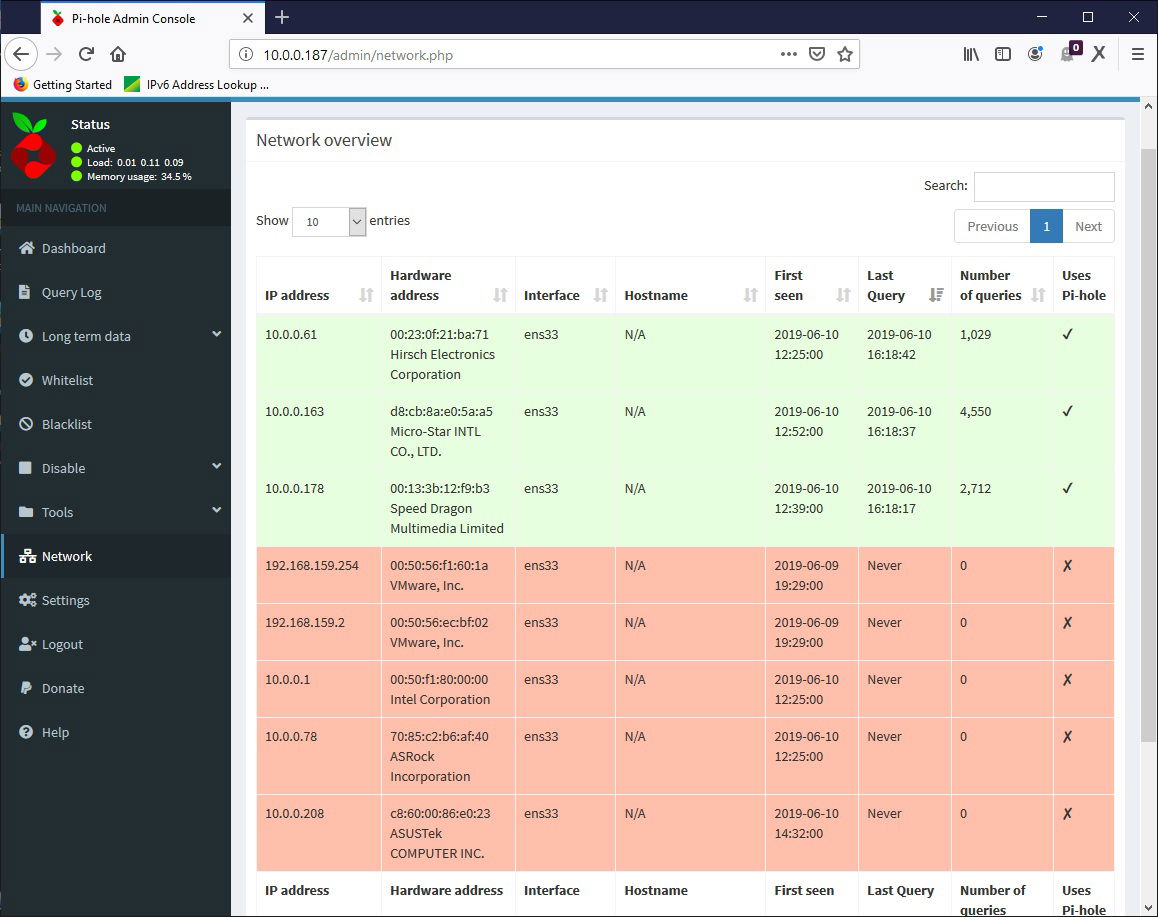
With many options available from the admin control panel, it has a network overview that will tell you which devices are using it and which aren’t! What a great feature.
Pi-hole uses a handful of free lists to block ad-sites. It also has an option to add servers to the block list. So if Windows telemetry is using up 2 Gig of your data a month, like is has been known to do, add Microsoft servers to the list and they’ll be blocked also.
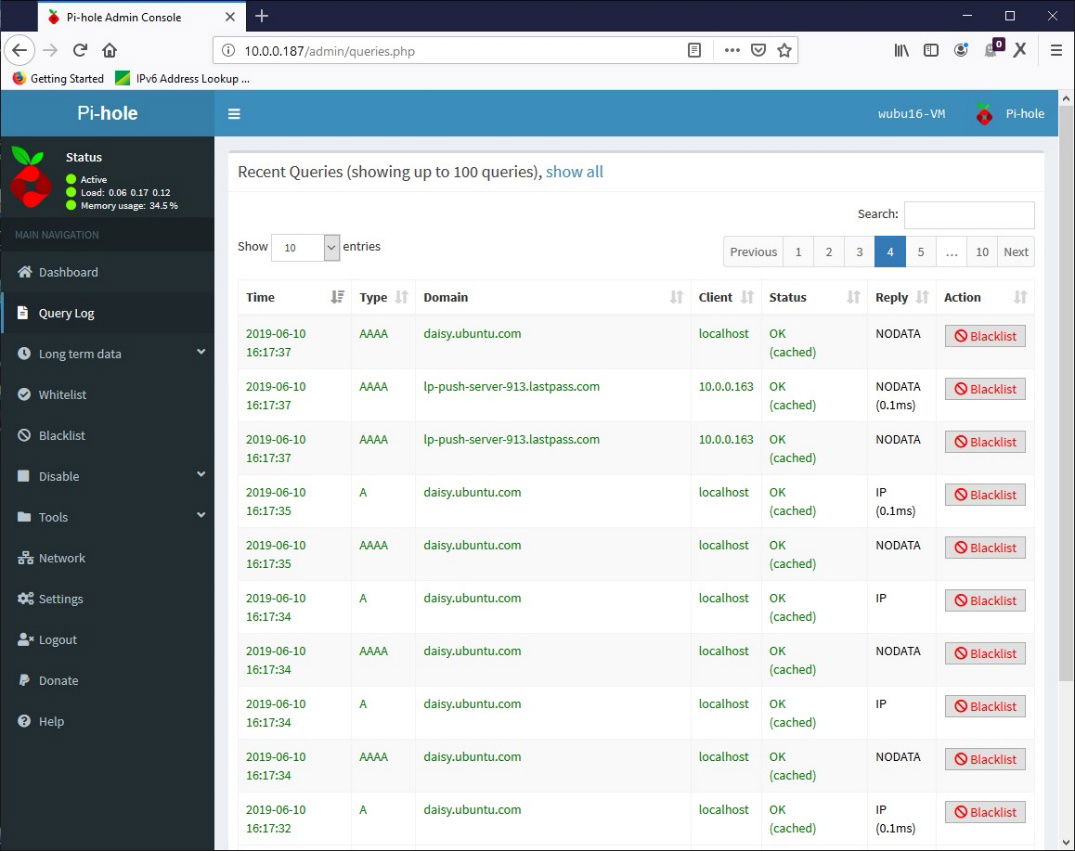
No admin panel would be acceptable without access to logs. This one logs the servers blocked, and a handful of other options. If security is needed, at setup, there’s a setting to determine how much information is logged. In this case, everything is logged.
So far, Pi-hole has been a great experience. I’m use to encountering unmet dependencies and version incompatibilities when testing Linux programs like Pi-hole, but this time I have been pleasantly surprised and duly impressed. Don’t be fooled though, Pi-hole doesn’t just work on Raspberry Pi’s, it works on an Ubuntu VM as well.
As for the answers to my questions? Time will tell. But for the price, ease of install, and quality of the interface, it would need dismal performance to override the benefits. Not only does it protect bandwidth, it can be customized to increase security by blacklisting known malicious sites.
Pi-hole is free but they do accept donations. Their product is upscale friendly and could help reduce high volume network traffic significantly on outward connections. It is completely customizable to be a new security appliance in the battle of the cyber world. Contact us today to see how CyDeR can help with your network security. This example shows how adding security doesn't have to be costly.
At home and have an old Athlon x2 or Core2 Duo sitting around gathering dust? Put that tech to use. Install your preference of light-duty Debian Distro and set Pi-hole to work filtering ad content on your network.

 beyond simple novelty. My first experience with the R-Pi board was when I purchased one for my son a few Christmas ago and then worked through a Python programming book with him using the Pi. There were no complaints from either of us about the Pi and the growing community of developers and kits make it a great platform for development of IoT devices, learning programming languages, and electronics.